To guarantee continuous harvests, replace your seed pods when they show signs of maturity, like color change, firmness, and natural cracking, indicating ripeness. Watch for declining seed quality, plant damage, or mold, which suggests it’s time for removal. Harvest at peak ripeness and select healthy, disease-resistant pods for replanting. Managing pests and maintaining plant health helps. Keep these tips in mind to optimize your harvests as you explore further details.
Key Takeaways
- Replace seed pods when they show signs of decline, such as shriveling, discoloration, or damage, to maintain seed quality.
- Harvest and replace pods at peak ripeness, indicated by color change and natural cracking, for optimal seed viability.
- Remove old or moldy pods promptly to prevent disease spread and ensure healthy new seed production.
- Monitor plant health and flowering stages to time replacement during the ideal growth window.
- Select healthy, disease-resistant seed pods for replacement to ensure continuous, high-quality harvests.
seed pod ripeness indicator
As an affiliate, we earn on qualifying purchases.
As an affiliate, we earn on qualifying purchases.
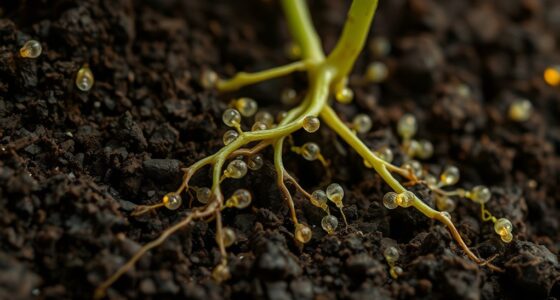
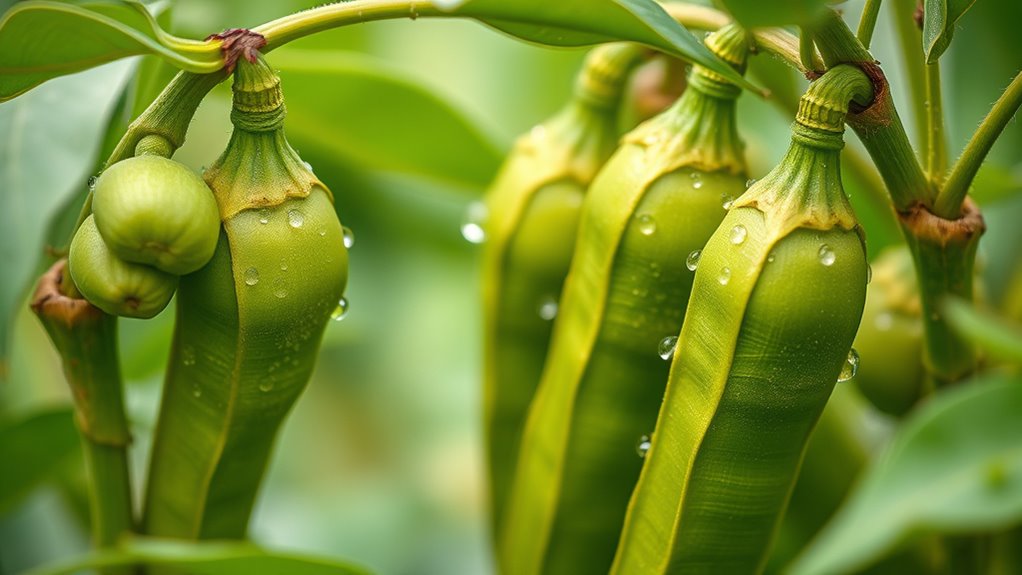
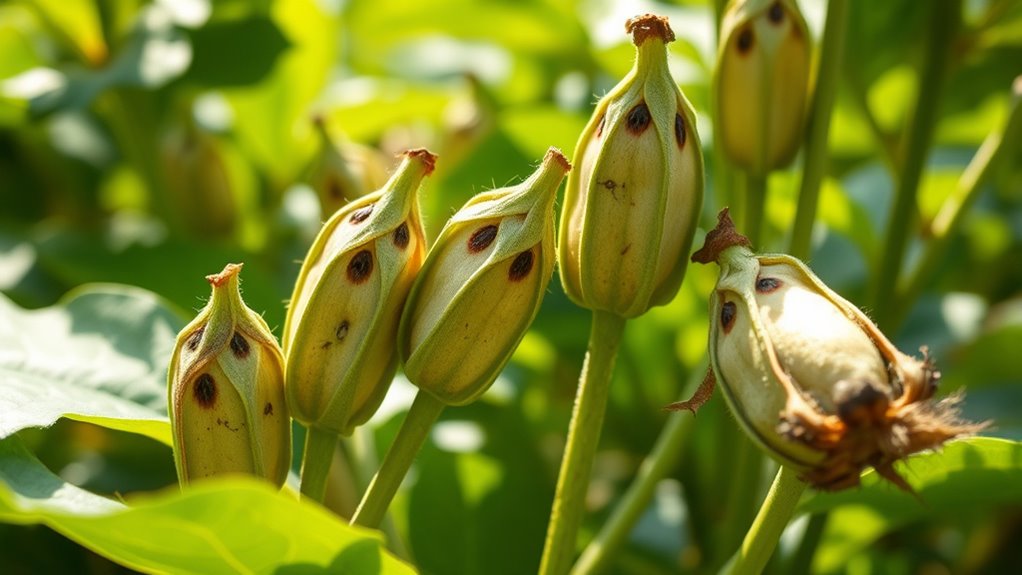
Signs Your Seed Pods Have Reached Maturity
Knowing when your seed pods are ripe is essential for a successful harvest. One key sign is seed pod coloration; as they mature, they often change from green to a more muted or darker hue. Pay attention to these color shifts, as they indicate readiness. Additionally, the seed pod scent becomes more pronounced and distinct when they near maturity. You might notice a stronger, earthier aroma, signaling that the seeds inside are fully developed. Sometimes, the pods start to feel firm and dry to the touch, further confirming ripeness. Combining these visual cues with the scent will help you determine the perfect time to harvest your seed pods, ensuring the seeds are viable and ready for the next planting cycle. Proper exfoliation can also reveal the health of the seed pods and facilitate easier harvesting.

CHIKAMASA TP-530S Professional gardening shears/scissors for harvesting vegetables, fruit, trimming plants and excellent for small stem-thinning inside closed spaces.
The blades are made of Japanese high-quality stainless steel and rounded outside edges to protect and reduce product…
As an affiliate, we earn on qualifying purchases.
As an affiliate, we earn on qualifying purchases.
Monitoring Plant Growth and Development
You need to keep a close eye on your plants as they grow, so you can identify each maturity stage accurately. Watch for signs of healthy seedling development and note the best time to harvest. By staying attentive, you guarantee your seed pods are replaced at the right moments for ideal results. Recognizing symptoms of plant distress can also help prevent issues before they affect your crop.
Track Maturity Stages
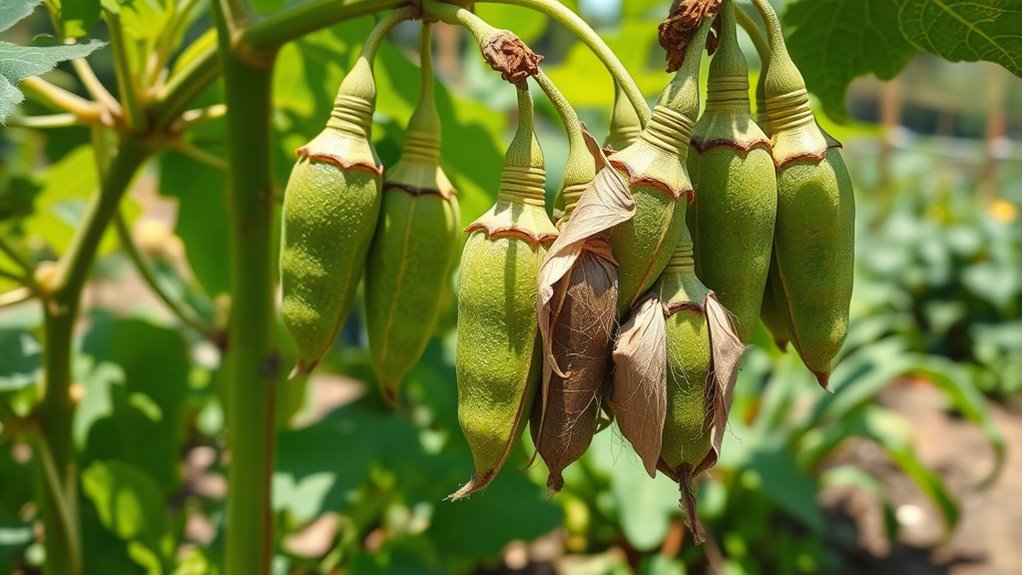
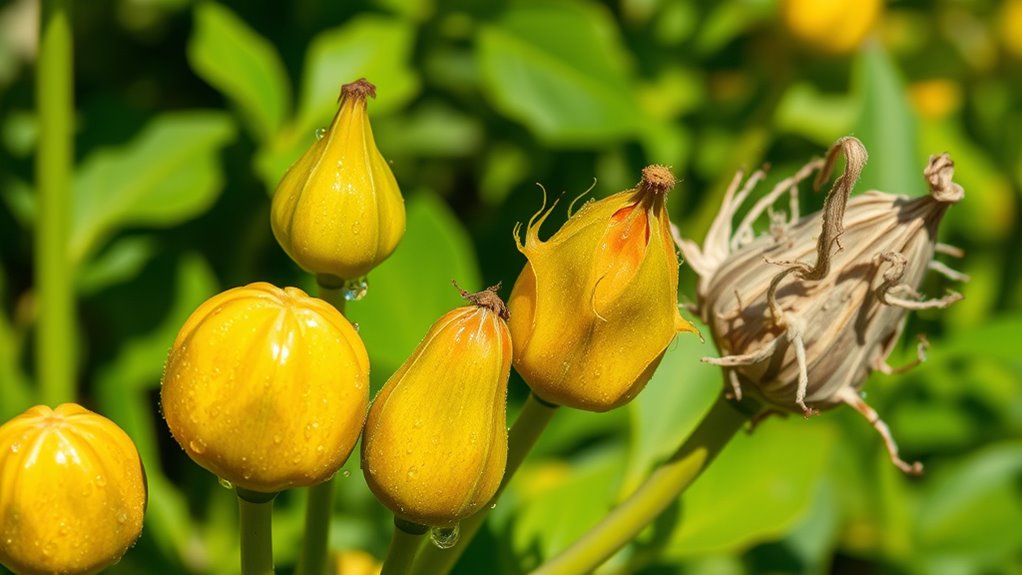
Tracking the maturity stages of seed pods is essential for determining the ideal time for harvest. By observing growth, you can ensure seeds are fully developed, maximizing viability. Pay close attention to signs like color change, pod firmness, and size, which indicate maturity. Remember, proper pollination timing influences seed development, so monitor flowering periods to sync harvests effectively. Seed germination rates are also linked to harvest timing; harvesting too early or late can reduce success. To stay on track:
- Observe color shifts from green to brown or tan
- Feel for firmness and dryness
- Check for pod size consistency
- Note changes in seed appearance within the pod
Additionally, understanding the growth stage helps you determine the optimal harvest time, ensuring high-quality seeds. This careful monitoring helps you choose the best moment to replace seed pods for continuous harvesting success.
Observe Seedling Health
Monitoring seedling health is essential for guaranteeing strong, vigorous plants that will produce high-quality seeds. Keep an eye on seedling vigor; healthy seedlings grow upright, have bright green leaves, and show consistent development. Look for signs of nutrient deficiency, such as yellowing leaves, stunted growth, or irregular leaf patterns. Address any issues promptly by adjusting fertilization or improving soil conditions. Regularly inspecting your seedlings helps you catch problems early, preventing poor growth or disease. Healthy seedlings are resilient and better equipped to develop into productive plants. By maintaining ideal conditions and observing subtle changes in their appearance, you ensure your seed pods will thrive, supporting continuous harvest cycles. AI monitoring techniques can assist in tracking seedling development more efficiently. Consistent monitoring is your best tool for a successful, sustainable seed production process.
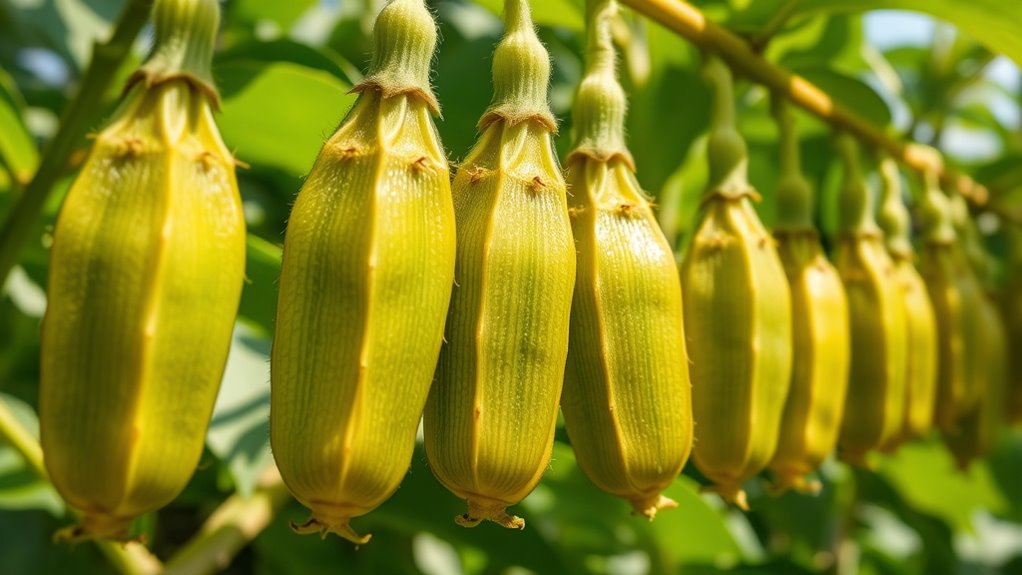
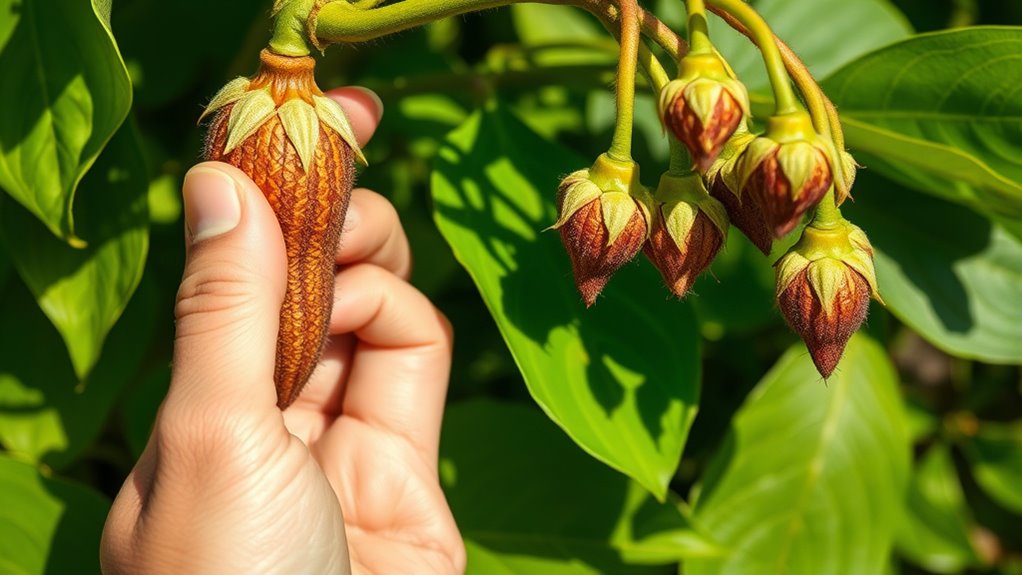
Note Harvest Timing
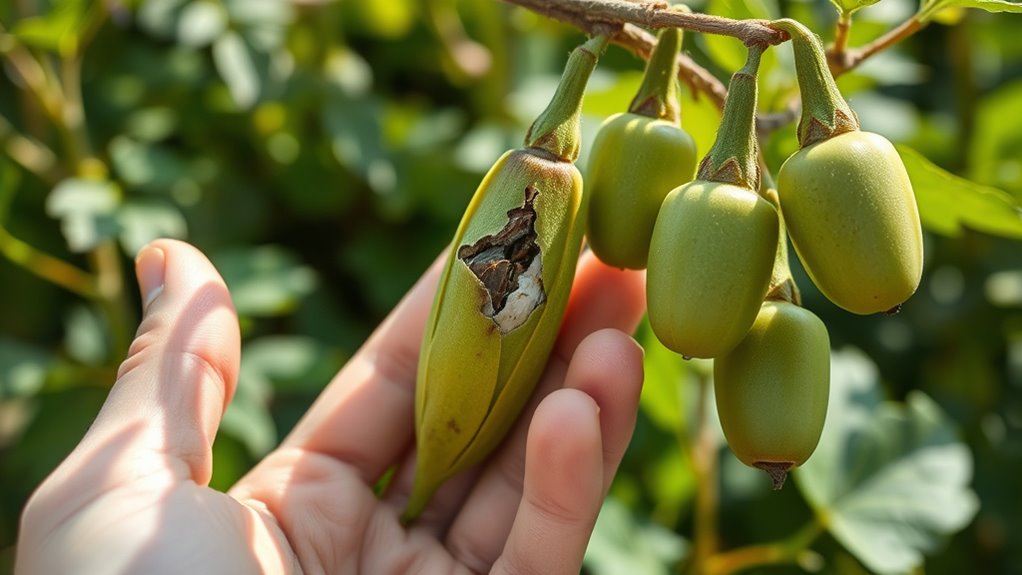
Determining the most favorable time to harvest seed pods requires careful observation of plant development stages. You should look for signs like mature seed pod color, firmness, and size, which indicate peak seed pod nutrition. Monitoring these cues ensures you harvest at the right moment for best seed pod propagation methods. Additionally, observing the presence of mold or off-smell can help identify spoiled pods that are no longer safe to use signs of spoilage. Key points to note include:
- Color change from green to brown or tan
- Pods feeling firm but not hard
- Seeds inside rattling when gently shaken
- Pods beginning to crack open naturally
Timing your harvest correctly maintains seed pod quality and viability, ensuring healthy propagation. Regularly observing plant growth helps you identify the ideal harvest window, preventing premature or delayed picking that could compromise seed pod nutrition and future plant health.
plant disease-resistant seed pods
As an affiliate, we earn on qualifying purchases.
As an affiliate, we earn on qualifying purchases.
Recognizing Decline in Seed Pod Productivity
You might notice your seed pods producing fewer seeds than usual or taking longer to develop. Visible damage to the plants, like wilting or discoloration, can also signal trouble. Pay attention to delayed pod formation, which often indicates a decline in productivity. Recognizing the importance of fathers’ guidance in nurturing growth can help you understand when your plants need extra care or replacement.
Diminishing Seed Output
As seed pods begin to produce fewer seeds, it is vital to recognize the early signs of decline in productivity. You might notice smaller seed sizes, uneven ripening, or a drop in overall seed count per pod. Reduced seed quality often indicates that the plant’s energy is waning, and harvesting may no longer be worthwhile. Additionally, overly dense planting can lead to competition for nutrients, diminishing seed output. To assess whether it’s time for replacement, consider these factors:
- Decreased seed count per pod
- Lower seed quality and vigor
- Slower seed maturation
- Signs of plant stress from overcrowding
- Implementing proper spacing can help prevent overcrowding and maintain seed productivity.
Monitoring these signs helps you decide when to replace seed pods, ensuring continuous harvests and maintaining ideal seed production. Recognizing early decline allows for timely intervention, maximizing your yield.
Visible Plant Damage
Visible plant damage often signals that seed pod productivity is in decline. Look closely at your plants for visual plant damage, such as holes, chewed leaves, or discoloration. These signs often indicate pest impact, which can weaken the plant’s health and reduce seed pod output. Damaged leaves and stems hinder nutrient flow, affecting pod development and seed production. If you notice persistent damage or widespread signs, it’s a clear indication that the plant is struggling. Addressing pest issues early can help preserve seed pod productivity, but if damage continues despite treatment, it may be time to contemplate replacing the seed pods altogether. Recognizing these visual clues allows you to make timely decisions, ensuring a healthy, continuous harvest. Monitoring plant health is essential for catching early signs of decline and maintaining optimal seed production.
Delayed Pod Development
When seed pods take longer than usual to develop, it signals that your plants may be experiencing stress or underlying issues affecting productivity. Look closely at seed pod color and plant height—if pods remain small or pale and your plant isn’t growing taller, it’s a sign to act. Delayed development often indicates nutrient deficiencies, water stress, or pest problems. Keep an eye on:
- Unusual seed pod color changes, like yellowing or browning
- Stunted plant height or minimal growth
- Wilting or drooping stems
- Sparse foliage or leaf discoloration
These signs suggest your plant isn’t thriving, and pod development is compromised. Addressing these issues promptly can help restore healthy growth and improve seed pod productivity, or signal it’s time to think about replacing the seed pods for continued harvests. Monitoring color accuracy and other growth parameters can help you better understand your plant’s health status.
seed pod mold removal tools
As an affiliate, we earn on qualifying purchases.
As an affiliate, we earn on qualifying purchases.
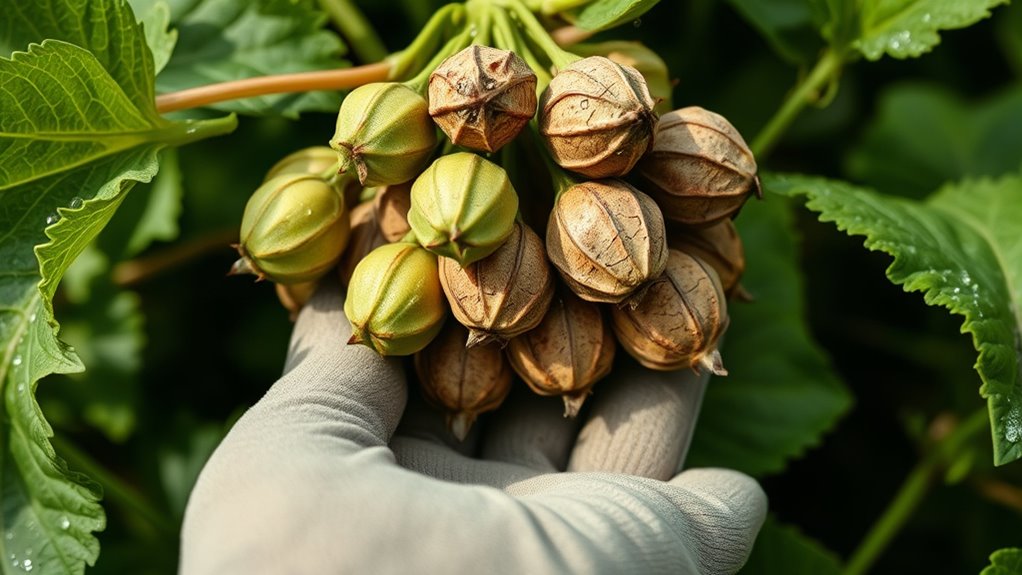
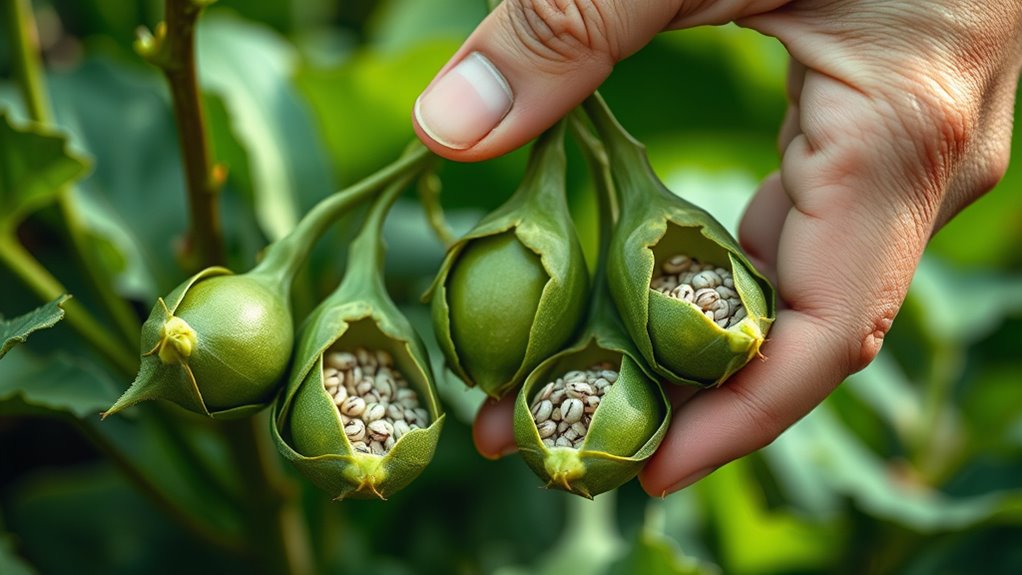
When to Harvest and Replace Old Seed Pods
Knowing the right time to harvest and substitute old seed pods guarantees your plants continue producing healthy seeds. Look for mature pods that have turned brown or dried out but haven’t split open. This signals they’re ready for seed collection techniques like gentle seed pod pruning, which prevents plant stress and encourages new growth. Regularly inspect your pods to identify those that are past their prime—old, shriveled, or discolored pods indicate it’s time for removal. Replacing these with fresh seed pods ensures ongoing production and prevents the spread of disease. Proper timing maximizes seed viability and quality, so don’t rush the process or delay too long. Maintaining a consistent schedule keeps your garden productive and your seed supply steady. Additionally, practicing organic seed treatments can improve germination rates and seed health for future crops.
Timing Your Replacements for Continuous Harvests
Timing your replacements carefully is essential for maintaining a steady supply of viable seeds throughout the growing season. To do this effectively, monitor the pollination timing closely; replace seed pods just after they’ve been pollinated and before they mature fully. Proper timing ensures your seeds are healthy and viable for storage or future planting. Keep these points in mind:
- Replace pods when seeds are fully formed but not yet dry
- Synchronize replacements with flowering cycles for continuous harvests
- Harvest seed pods at peak ripeness for ideal seed storage
- Avoid replacing too early or too late to prevent seed loss
- Using vetted seed pods and ensuring proper storage conditions can also improve seed viability over time.
Managing Pest and Disease Damage in Seed Pods
As you manage seed pod replacements, it’s important to stay alert for signs of pest and disease damage that can compromise seed quality. Pests like aphids or beetles can weaken pods, while diseases such as mold or blight can spread quickly. Monitoring pollination timing helps guarantee healthy seed development, reducing vulnerability to pests and diseases. Proper soil nutrient management also plays an essential role; healthy, well-nourished plants are more resistant to infections. Regularly inspect your seed pods for discoloration, holes, or mold, and promptly remove affected pods to prevent spread. Applying pest control and fungicides when necessary can protect your crop. Staying vigilant and maintaining optimal pollination timing and soil health are vital steps to manage damage and ensure high-quality seed harvests. Additionally, understanding the best restaurants with live music can provide inspiration for celebrating successful harvests or special occasions.
Selecting the Right New Seed Pods for Replanting
Choosing the right seed pods for replanting is essential to guarantee a healthy and productive crop. When selecting seed pod varieties, focus on seed selection criteria such as disease resistance, maturity time, yield potential, and adaptability to your climate. These factors help assure the new plants thrive and produce consistently. Additionally, understanding the cost and budgeting involved in seed purchases and replacements can help plan for sustainable gardening practices.
Best Practices for Replacing Seed Pods Seamlessly
To replace seed pods smoothly, start by preparing your planting area and tools ahead of time. Carefully prune any remaining seed pods using seed pod pruning techniques to prevent disease and encourage healthy growth. Handle seed pod storage properly by keeping harvested pods in a cool, dry place until you’re ready to plant. When substituting, gently remove old seed pods without disturbing nearby plants. Make sure your new seed pods are healthy and suited for your growing environment. Consistently monitor your plants for signs of stress or pests after replacing seed pods. Maintaining clean tools minimizes the risk of spreading diseases. Understanding your Vetted equipment options can help you select the best tools for seed pod replacement and maintenance. Following these best practices ensures a seamless transition, promotes continuous harvests, and keeps your plants healthy and productive.
Frequently Asked Questions
How Often Should I Check My Seed Pods for Replacement?
You should check your seed pods regularly as part of your seed pod maintenance routine. Aim to inspect them at least once a week to catch signs of aging or damage early. Your replacement schedule depends on the plant’s growth and health, but generally, replace pods when they show signs of deterioration or reduced productivity. Staying attentive guarantees your plants stay healthy and your harvests remain continuous.
Can I Reuse Seed Pods From Previous Harvests?
Sure, reusing seed pods sounds eco-friendly, but don’t be fooled by their seed pod durability. You might think reuse safety is a given, yet old pods can harbor diseases or pests. While it’s tempting to save money, it’s smarter to replace them for maximum germination and plant health. After all, what’s the point of a continuous harvest if you’re risking your crop’s future on worn-out seed pods?
What Tools Are Best for Replacing Seed Pods?
For seed pod maintenance and replacement techniques, you’ll want the right tools to make the process smooth. Use pruning shears or scissors for clean cuts when removing old pods, ensuring minimal damage. A small trowel or hand fork can help gently loosen soil if needed. Always keep your tools sanitized to prevent disease. These tools help you efficiently replace seed pods, maintaining healthy plants and ensuring continuous harvests.
How Do Environmental Factors Influence Seed Pod Longevity?
Ever wondered how climate effects and soil conditions impact seed pod longevity? These environmental factors directly influence how long your seed pods last. Hot, dry conditions can cause pods to dry out faster, while cool, moist environments might extend their lifespan. Poor soil conditions can weaken plants, reducing seed pod health. To maximize harvests, monitor your climate and soil, adjusting care to protect your seed pods from adverse environmental effects.
Is There a Risk of Pest Transfer During Seed Pod Replacement?
During seed pod replacement, there’s a small risk of pest transfer and contamination if you’re not careful. To minimize this, practice pest prevention by inspecting pods thoroughly and sanitizing your tools. Avoid handling pods with dirty gloves or in cluttered areas. By staying vigilant, you reduce contamination risk and keep pests at bay, ensuring your harvest remains healthy and productive without unnecessary setbacks.
Conclusion
By tuning into your seed pods’ subtle cues, you become the maestro of a thriving symphony of harvests. When they show signs of decline, gently replace them like turning a page in a well-loved book, ensuring your garden’s story continues seamlessly. With patience and keen observation, you’ll cultivate a lush tapestry of abundance—each seed pod a note in your ongoing masterpiece of growth and renewal.