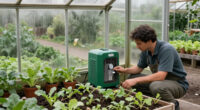
Choose and set up a greenhouse heater that can maintain the temperature your plants need. This guide is for gardeners with basic measuring and installation skills who can follow the heater manufacturer’s instructions. Expect 2–4 hours for planning and setup, followed by an overnight temperature check. Fuel and electrical work can add time or require a qualified professional.

Get garden gear delivered free with Prime
- Fast, free delivery on millions of items
- Prime Video, Amazon Music and more included
- Member-only deals all year

Noarixa Greenhouse Heater with Thermostat, 1500W Outdoor Heaters for Patio
- ✔ Maximum power: 1500W
- ✔ Power levels: 20W, 750W, 1500W
- ✔ Thermostat range: 5–42°C (41–108°F)

Joanolga Greenhouse Heater with Thermostat, 1500W Electric Outdoor Heater
- ✔ Maximum power: 1500W
- ✔ Power levels: 20W, 750W, 1500W
- ✔ Thermostat range: 5–42°C (40–108°F)

LHUKSGF Greenhouse Heater with Thermostat, 1500W Patio Heater, Red
- ✔ Maximum power: 1500W
- ✔ Power levels: 20W, 750W, 1500W
- ✔ Thermostat range: 5–42°C (41–108°F)
Difficulty: Intermediate | Time: 2–4 hours for planning and installation; allow a night to check performance
What You’ll Need
Tools & Materials:
- Tape measure
- Minimum–maximum greenhouse thermometer or digital temperature logger
- Manufacturer-approved mounting hardware
- Power or fuel supply specified for the heater
- Protective gloves and eye protection for installation
Knowledge:
- Basic greenhouse dimensions and plant temperature needs
- How to read a heater’s installation and safety instructions
- How to identify a suitable electrical circuit or fuel connection
Read the heater manual before buying or installing the unit. Check local electrical, building, and fire rules. Arrange a qualified electrician or gas technician for any wiring, circuit changes, gas line work, or fuel connection you are not qualified to perform.
Noarixa Greenhouse Heater with Thermostat, 1500W Outdoor Heaters for Patio
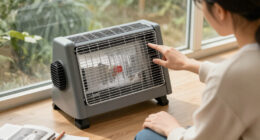
The Noarixa earns our top spot because its listed greenhouse essentials come together in a relatively low-profile body: three power levels, adjustable thermostat control, and a circulation mode. Its 8.8 by 12 by 6.5 inch dimensions are broader but shorter than the Joanolga and LHUKSGF units, a shape that may suit a low shelf or floor position where vertical clearance is limited. The listing also gives a 5–42°C control range, automatic cycling, IPX4 splash resistance, and overheat protection.For seedlings or overwintering plants in a small enclosed area, the lower setting and thermostat are more useful decision points than a quick-start heating claim: they allow gentler operation when full output is unnecessary. Compared with the other two, the Noarixa specifically describes both heating and circulation modes, which may appeal when growers want air movement without selecting a heat setting. Its limitation is the same fundamental one shared by this lineup: 1500W forced air can warm a contained space, but the listing does not show how evenly it will hold temperature in a leaky or larger greenhouse. We would skip it if adjustable airflow direction is a priority, since the Joanolga specifically lists an adjustable angle.
Pros:
- Three settings include 750W low heat and 20W circulation mode.
- Adjustable thermostat spans 5–42°C with automatic cycling.
- Shorter listed height than the other two models.
- IPX4 splash resistance and overheat protection are specified.
Cons:
- No adjustable angle or carry handle is specified in the listing.
- The 160-square-foot coverage claim depends on conditions and is not a performance guarantee.
- IPX4 does not mean the unit can be exposed to direct water.
Best for: Growers seeking a low-profile portable heater with thermostat cycling and a stated circulation mode for a small greenhouse or grow tent.
Not ideal for: Owners of large, drafty greenhouses or anyone who needs documented directional adjustment or a heater designed for fixed installation.
Bottom line: We’d choose the Noarixa for its compact proportions and clearly stated circulation option, provided the greenhouse is small and reasonably sheltered.
“We’d choose the Noarixa for its compact proportions and clearly stated circulation option, provided the greenhouse is small and reasonably sheltered.”
Joanolga Greenhouse Heater with Thermostat, 1500W Electric Outdoor Heater
Among these near-matches, the Joanolga stands apart on placement: it has a built-in carry handle and adjustable angle. That makes it the most flexible option for growers who move a heater between a greenhouse, grow tent, or covered work area, or need to aim airflow around a particular zone. At 6.3 by 8.2 by 10.2 inches, it is taller than the Noarixa but has a smaller listed footprint, so the right choice depends on shelf and floor clearance.Its greenhouse control package otherwise tracks closely with the top pick: 20W fan-only, 750W eco, and 1500W high modes, an adjustable 40–108°F thermostat, automatic cycling, IPX4 water resistance, and overheat protection. The listing explicitly calls out quiet operation and a timer, but those details do not change the main tradeoff: as a 1500W forced-air heater, it is still best viewed as supplemental warmth for a contained area. Compared with the Noarixa, it offers clearer directional placement but does not describe a separate heating-and-circulation arrangement as distinctly. Choose it for portability and angle adjustment; skip it if a lower profile or a more clearly specified circulation mode matters more.
Pros:
- Adjustable angle helps direct the forced-air output.
- Built-in carry handle supports moving it between spaces.
- Three power modes and 40–108°F thermostat range.
- IPX4 housing and overheat protection are listed.
Cons:
- Its 10.2-inch height is greater than the other listed units.
- A 1500W maximum remains limited for larger or poorly insulated greenhouses.
- The listing’s up-to-160-square-foot claim will vary with conditions.
Best for: Growers who reposition a heater and want to angle airflow toward a seedling area, plant bench, or tent.
Not ideal for: Those with low vertical clearance or greenhouse owners needing a larger-capacity heating system for a drafty space.
Bottom line: We’d pick the Joanolga when moveability and directional airflow outweigh a shorter heater body.
“We’d pick the Joanolga when moveability and directional airflow outweigh a shorter heater body.”
LHUKSGF Greenhouse Heater with Thermostat, 1500W Patio Heater, Red
The LHUKSGF is a straightforward choice for buyers who want the core controls without a standout placement feature. It offers three power modes, a 41–108°F thermostat, automatic cycling, and IPX4 resistance, with a listed height of 11 inches and a 6.4 by 8.2 inch base. Those dimensions put it close to the Joanolga in footprint, though it is slightly taller on paper and lacks the Joanolga’s specifically stated adjustable angle and carry handle.Like the other two, this unit uses PTC ceramic forced air and lists a 1500W maximum with a 750W lower heat setting and 20W standby or fan-only setting. Its described benefit is a simple range of outputs for changing conditions, not a unique capacity advantage. Compared with the Noarixa, the LHUKSGF has a more conventional upright profile and does not specifically emphasize a distinct circulation mode; compared with the Joanolga, its listing gives less help for directing or carrying airflow. It may make sense where basic thermostat control and splash resistance are the priorities, but we would look elsewhere if adjustability or a shorter overall height is central to placement.
Pros:
- Three settings cover fan-only or standby, lower heat, and full output.
- Thermostat range is specified as 41–108°F.
- IPX4 water resistance and overheat protection are listed.
- PTC forced-air format suits portable supplemental heating.
Cons:
- No carry handle or adjustable angle is specified.
- It is the tallest listed unit at 11 inches.
- The 160-square-foot claim cannot account for insulation or outdoor conditions.
Best for: Growers who want a compact floor unit with a thermostat and three output choices, and do not need an adjustable angle.
Not ideal for: Buyers who need documented directional airflow, an especially low-profile unit, or heating for a large uninsulated greenhouse.
Bottom line: We’d consider the LHUKSGF for basic thermostatic warmth when the Joanolga’s angle adjustment and the Noarixa’s circulation emphasis are not needed.
“We’d consider the LHUKSGF for basic thermostatic warmth when the Joanolga’s angle adjustment and the Noarixa’s circulation emphasis are not needed.”
As an Amazon Associate we earn from qualifying purchases.
Before You Start
Check the coldest temperature your plants can tolerate and the lowest temperatures typical for your location. Greenhouse heaters are not all suitable for every structure: confirm the unit is rated for the greenhouse environment and intended fuel or power source. Keep heaters away from water, leaves, plastic film, and stored fuel. Never use an outdoor combustion heater in an enclosed greenhouse unless its manufacturer explicitly approves that use; combustion can produce carbon monoxide and consume oxygen.
Do not rely on a heater’s advertised area rating alone. Heat loss depends on greenhouse size, glazing, air leaks, wind exposure, and the difference between indoor and outdoor temperatures. Use the manufacturer’s sizing guidance or consult a greenhouse heating professional if the required capacity is unclear.
Step-by-Step Instructions
Step 1: Set the temperature target
Write down the minimum night temperature your most sensitive plants need, using reliable plant care guidance. Decide whether the goal is to prevent frost, maintain active growth, or protect a specific crop; these goals call for different setpoints. Use a thermostat with a suitable temperature range, and place an independent thermometer near plant height to check actual conditions.
Tip:Different plants may need different temperatures. Group plants with similar needs, or heat a smaller insulated area rather than raising the temperature of the entire greenhouse.
Check: You have a clear minimum temperature target and a way to measure the air temperature near the plants.
Step 2: Measure the greenhouse and check heat loss
Measure the greenhouse’s length, width, and height, and note the glazing type and whether it is single or double layer. Inspect doors, vents, frame joints, and glazing for gaps or damage. Close doors and repair loose glazing or obvious drafts with materials suitable for the greenhouse.
Tip:Do not seal required ventilation openings or block vents that the heater manufacturer says must remain clear.
Check: You have recorded the greenhouse dimensions and corrected obvious air leaks without obstructing ventilation.
Step 3: Select a suitable heater and supply
Compare thermostatically controlled electric, gas, or other greenhouse-rated heaters based on the manufacturer’s capacity guidance, available supply, operating cost, and installation requirements. Confirm the heater is approved for damp greenhouse conditions and that its power cable, plug, or fuel connection matches the specified supply. Choose a model with safety features such as overheat protection where available.
Tip:Do not use an extension lead as a permanent supply unless the heater instructions and a qualified electrician confirm that arrangement is safe for the load and damp location.
Check: The heater’s rating and supply match the greenhouse and the manufacturer’s installation requirements.
Step 4: Choose a safe mounting position
Mark a position that gives the heater the clearances specified in its manual. Keep it stable and out of walkways, away from plants, curtains, plastic film, irrigation spray, water containers, and combustible materials. Aim the warm airflow toward open space so it can circulate without blowing directly onto foliage.
Tip:For suspended or wall-mounted units, use the supplied mounting method and attach it to a support that can carry the heater’s weight. Do not hang a heater from greenhouse glazing or a weak frame member.
Check: The selected position meets the stated clearance distances and allows air to circulate around the heater.
Step 5: Install and connect the heater
Turn off the relevant power or fuel supply before mounting the unit. Install it exactly as described in the manual, then connect it only to the specified supply. Have a qualified professional complete electrical wiring, new circuits, gas work, or any connection that requires a licence or specialist testing. Restore the supply only after the heater is secure and the installation has been checked.
Tip:Do not alter plugs, wiring, gas fittings, guards, or safety controls. Stop and arrange professional help if a connection does not match the manual.
Check: The heater is firmly mounted, connections follow the manufacturer’s instructions, and any required professional inspection is complete.
Step 6: Position the thermostat and thermometer
Set the thermostat sensor near plant height in a shaded, representative area. Keep it away from the heater’s direct airflow, cold glazing, doors, vents, and direct sun, which can make it read warmer or colder than the plants’ surroundings. Place the separate thermometer nearby without touching a surface.
Tip:If the thermostat sensor is built into the heater, use a separate remote sensor or temperature logger if the manufacturer supports it. A heater-mounted sensor can read the heater’s immediate surroundings instead of the plant zone.
Check: The thermostat and independent thermometer are close to the plants, shielded from direct heat and sun, and not touching glazing or frame parts.
Step 7: Set the thermostat and test operation
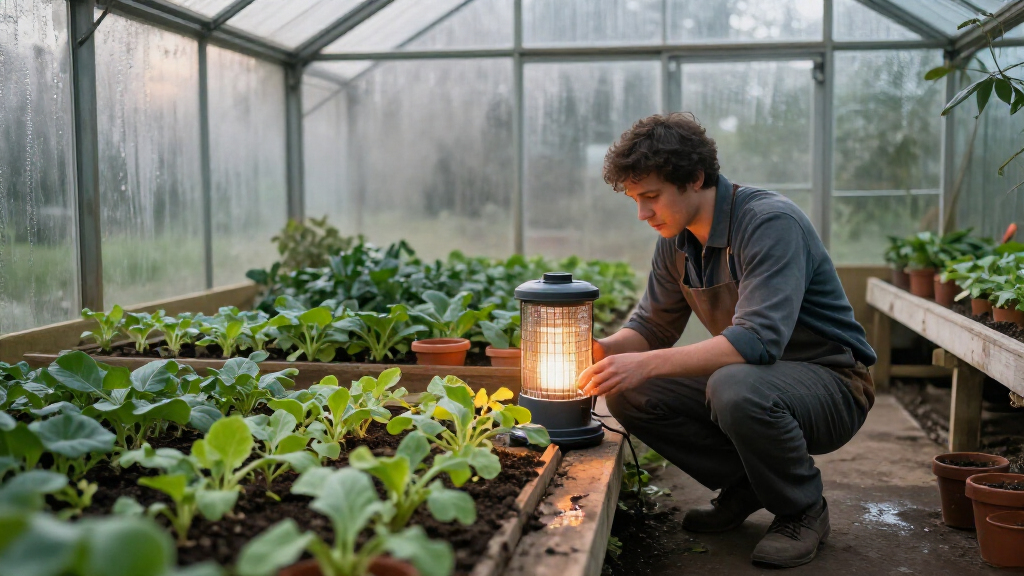
Set the thermostat to the minimum temperature required by your plants, following the controls described in the manual. Turn the heater on and observe one complete heating cycle. Check that it starts when the temperature falls below the setpoint and stops when the target is reached. Keep the greenhouse attended during the first test and check for unusual smells, noises, smoke, hot cables, or unstable mounting.
Tip:Turn the unit off immediately if you notice smoke, a burning smell, sparking, a fuel smell, or abnormal heat at a plug or connection. Follow the manufacturer’s emergency instructions and contact a qualified technician.
Check: The heater starts and stops in response to the thermostat, with no visible damage, abnormal odor, smoke, or excessive heat at the supply connection.
Step 8: Check overnight temperature and airflow
Record the minimum and maximum temperatures near plant height for at least one cold night. Compare the minimum reading with your target, and check for cold pockets at the greenhouse edges or near doors. If the temperature falls short, inspect for drafts and confirm the heater’s capacity and thermostat readings before changing the setpoint. Adjust airflow or add suitable insulation only as the heater and greenhouse instructions allow.
Tip:Keep required ventilation available. Do not cover a heater or place objects against its intake or outlet to redirect heat.
Check: The overnight minimum stays at or above the target, or you have identified a specific capacity, draft, or sensor issue to address.
Common Mistakes to Avoid
- Choosing a heater from its advertised area rating without accounting for glazing, drafts, or local winter temperatures. — Measure the greenhouse, reduce obvious heat loss, and follow the manufacturer’s sizing guidance for your conditions.
- Placing the thermostat beside the heater or against cold glazing. — Position the sensor at plant height in a shaded area away from direct airflow, doors, and glazing.
- Using an unapproved extension lead or making a fuel or wiring connection without the right qualifications. — Use the specified supply and have a qualified professional handle installation work that requires one.
- Blocking ventilation or putting foliage and combustible materials too close to the heater. — Follow the manual’s clearances and keep vents, air intakes, and outlets unobstructed.
Troubleshooting
Problem: The greenhouse temperature stays below the thermostat setting.
Solution: Check the independent thermometer placement, heater controls, closed doors, and drafts. Confirm that the heater has adequate capacity for the greenhouse and outdoor conditions. If it runs continuously or does not heat, switch it off if it appears damaged and contact the manufacturer or a qualified technician.
Problem: The heater cycles on and off frequently.
Solution: Move the thermostat sensor away from the heater’s airflow, direct sun, doors, and vents. Check that the sensor is installed as instructed and that the heater is not overheating or obstructed.
Problem: One part of the greenhouse is much colder than another.
Solution: Check for gaps, cold glazing, and stagnant air. Reposition plants or the heater only within the specified clearances, and use a suitable circulation fan if approved for the greenhouse environment.
Problem: The heater trips a breaker, smells of fuel, or gives off smoke or unusual heat.
Solution: Turn it off and isolate the power or fuel supply only if you can do so safely. Leave the area if you suspect a gas leak or combustion fumes, and contact emergency services or a qualified technician as appropriate. Do not restart the heater until it has been checked.
What Success Looks Like
The heater is securely installed according to its manual, its supply and clearances are correct, and the thermostat controls a full heating cycle. An independent thermometer near plant height records temperatures at or above the selected minimum through a cold night. Required ventilation remains open, and there are no unusual odors, smoke, hot connections, or signs of plant heat stress.
Next Steps
Check the thermometer each morning during cold weather and record unusually low readings. Remove dust and plant debris from the heater only after switching it off and letting it cool, following the manual’s cleaning instructions. Inspect cables, mounts, guards, and fuel connections regularly; schedule professional servicing at the interval the manufacturer recommends. Recheck the setpoint when you change crops, add insulation, or move the sensor. If the heater cannot maintain the target, arrange a capacity review before relying on it during severe cold.
Frequently Asked Questions
What temperature should I set a greenhouse heater to?
Use the minimum night temperature recommended for the most sensitive plants in the heated area. There is no single suitable setting for every greenhouse or crop; check plant care guidance and verify the result with a thermometer at plant height.
Can I use a household space heater in a greenhouse?
Use one only if its manufacturer approves it for the damp conditions and installation method in your greenhouse. Check its clearance, supply, and safety requirements. Do not assume an indoor rating makes it suitable near irrigation, condensation, or plastic glazing.
Can I leave a greenhouse heater on overnight?
Only if the heater is designed for unattended operation, installed as instructed, and controlled by a suitable thermostat. Follow the manual’s requirements and check the setup during an attended test before relying on it overnight.
Why does my greenhouse heater run constantly?
The heater may be undersized, heat may be escaping through gaps, the target may be too high for the conditions, or the thermostat sensor may be poorly placed. Check the sensor and greenhouse for drafts, then compare the heater capacity with the manufacturer’s sizing guidance.
Do I need a fan with a greenhouse heater?
A suitable circulation fan can help reduce temperature differences in some greenhouses, but it must be rated for the environment and positioned so it does not obstruct the heater. Follow both manufacturers’ instructions and confirm airflow does not dry or damage plants.