
This checklist is for greenhouse growers who want a practical way to think through temperature, airflow, shade, heat, and humidity. It covers both equipment choices and the everyday checks that help you decide what your greenhouse needs.

Get garden gear delivered free — and shop member deals
- Fast, free delivery on millions of items
- Access to Prime Big Deal Days deals on October 6–7
- Prime Video, Amazon Music and more included
The sections follow the main climate-control jobs: measure conditions, manage roof ventilation, circulate air, reduce direct sun, add heat, and add moisture. Each equipment section focuses on the named pick and the fit questions to consider before choosing it.
Use the checklist as a walk-through of your space. Start by observing conditions across the greenhouse, then compare each slot with your structure, power access, and growing setup. Choose only the controls that address a condition you have actually observed.
Greenhouse Thermometers
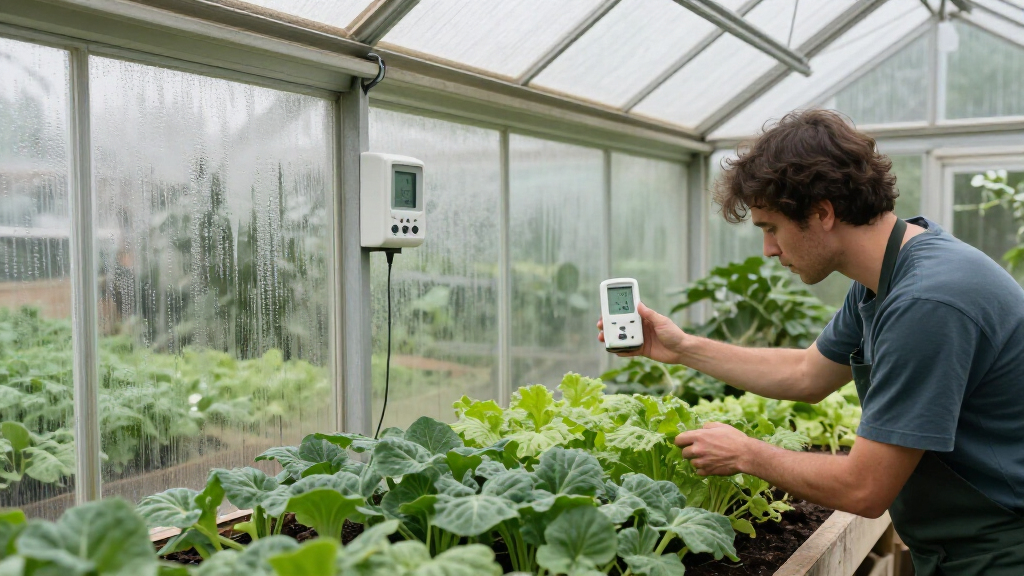
A thermometer gives you a reference point for decisions about ventilation and heating. Without regular readings, it is easy to react to how the greenhouse feels at the door while conditions differ elsewhere. Check more than one location when the space has distinct areas, and take readings at different times to understand how conditions change.
A common mistake is choosing a thermometer based only on its display or placing it where sunlight, a heater, or an open vent can distort the reading. Think about whether you want a simple spot check or readings you can compare over time. Place the instrument where it reflects the conditions around your plants, and make sure it is easy to read from your normal inspection path.
Before buying, consider the greenhouse layout, the range of conditions you need to monitor, and whether you need one or several measurement points. Keep the device accessible for routine checks, and use the same locations consistently. A repeatable measuring habit makes it easier to judge whether a change in airflow, shade, or heat is having the intended effect.
What to look for:
- A display that is easy to read from your usual inspection route
- Placement options suited to the greenhouse structure
- A practical way to compare readings over time
- Locations away from direct sun or nearby heat sources
- Enough measurement points for separate greenhouse areas
Automatic Vent Openers
Automatic vent openers can help manage roof ventilation as greenhouse conditions change, making them a useful slot to consider when manual vent checks are difficult to keep up with. The pick listed here is the Amylove 4 Pcs Dual Spring Automatic Roof Vent Opener Greenhouse Access. Before selecting it, verify that the opener suits the roof vent design and the way your greenhouse is built.
A frequent buying mistake is assuming that an opener will fit any roof vent or that its operation will match the needs of every growing space. Check the vent’s opening direction, attachment points, and available clearance. Consider how many vents you intend to automate and whether the structure provides a suitable mounting surface. Also think through how you will reach the vent for inspection or seasonal adjustment.
Match the opener to the actual vent rather than relying on the product name alone. Review the greenhouse’s frame and vent dimensions, and confirm that installation can be completed without interfering with nearby panels or equipment. Keep a manual way to inspect ventilation during setup, then observe how the vent responds in your greenhouse. Compatibility comes first; a well-matched opener is easier to integrate into a routine than one chosen without checking the structure.
What to look for:
- Fit with the roof vent’s dimensions and opening direction
- Attachment points compatible with the greenhouse frame
- Clearance for the vent to open without obstruction
- A plan for inspecting and adjusting the installed opener
- The number of vents you want to automate
Amylove 4 Pcs Dual Spring Automatic Roof Vent Opener Greenhouse Accessories
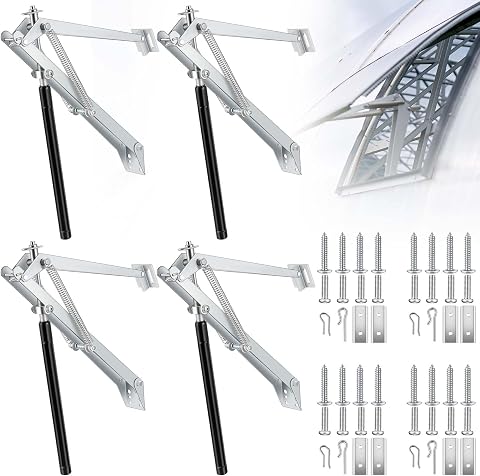
This set includes four solar heat-sensitive automatic greenhouse vent openers designed to maintain optimal temperatures by opening at 25°C and closing at 15-18°C. Made of durable aluminum alloy, these openers are suitable for greenhouse windows and vents, even in windy conditions, without the need for batteries or electrical power.
Pros:
- Durable and reusable aluminum alloy construction
- Solar-powered, no batteries or electrical wiring needed
- Effective in windy and mountainous areas
- Easy to install with included accessories
Cons:
- Limited to specific temperature ranges
- Requires direct sunlight for optimal operation
- May not be suitable for very large greenhouse vents
Best for: Greenhouses with compatible roof vents that need routine ventilation
Not ideal for: Structures whose vent dimensions or mounting points are uncertain
Bottom line: Confirm roof vent fit and clearance before choosing the Amylove opener.
Greenhouse Circulation Fans
Air circulation is a separate consideration from bringing fresh air through a vent: it helps address stagnant areas within the greenhouse. The listed pick is the Greenhouse Air Circulation Fan with Mist and Water Pipe, 1/3 HP, 115V,. Its name indicates a fan with mist and a water pipe, so consider whether those functions suit your layout and how you intend to manage water near electrical equipment.
Do not choose a fan based on its name alone. Check the greenhouse dimensions, mounting options, available power, and the locations where air movement is needed. A fan placed where shelves, plants, or structural members block its path may not serve the areas you want to reach. Also confirm how the misting and water-pipe components are intended to connect and whether your setup can accommodate them.
Think through access for cleaning and inspection before settling on a mounting position. Consider where water will go, how the fan will be powered, and whether its airflow can reach the intended growing area without creating an unwanted direct stream on plants. Verify the 115V specification against your available supply. Plan airflow and water together so the combination of fan, mist, and plumbing fits the greenhouse rather than complicating it.
What to look for:
- Power compatibility with the listed 115V specification
- Mounting options suited to your greenhouse structure
- Airflow path that reaches the areas needing circulation
- A workable connection plan for the mist and water pipe
- Safe placement and access for cleaning and inspection
Greenhouse Air Circulation Fan with Mist and Water Pipe, 1/3 HP, 115V, Ceiling/W

This high-velocity circulation fan features corrosion-resistant construction and a powerful airflow of 5470 CFM, ideal for greenhouses, patios, and industrial spaces. It includes a misting system with an 18,000 BTU cooling capacity for rapid temperature reduction, suitable for outdoor and indoor environments.
Pros:
- Powerful airflow suitable for large spaces
- Corrosion-resistant and durable construction
- Includes misting system for cooling
Cons:
- High power consumption at 380W
- May be bulky for small spaces
- Requires installation and maintenance of water/misting system
Best for: Growers whose setup can accommodate airflow and misting together
Not ideal for: Greenhouses without a suitable power source or water connection plan
Bottom line: Check power, placement, and water routing before integrating this fan.
Greenhouse Shade Cloth
Shade cloth is a way to manage direct sun across the growing space. The listed pick is the E.share 40%-50% Black Shade Cloth for Garden, 20x100FT Sun Block Mesh. Consider the stated shade range and the cloth’s dimensions against your greenhouse’s exposure and coverage needs; coverage has to match the structure for the material to be useful.
A common mistake is ordering by the greenhouse’s footprint without accounting for how the cloth will be attached or whether it must cover the roof, sides, or both. Measure the surfaces you intend to shade, including allowances for your chosen attachment method. Think about access to doors and vents, and make sure the installation will not prevent roof vents from opening as intended.
Before choosing this size, map the areas that receive direct sun and decide where shade is most useful. Confirm how you will secure the cloth to your frame and whether the installation can be adjusted or removed as conditions change. The stated 40%-50% range is part of the product description; use your growing setup and observed light conditions to decide whether that range is appropriate. Measure before you order, and preserve clearance around vents and other controls.
What to look for:
- Dimensions that cover the intended roof or side areas
- Shade range suited to observed light conditions
- Attachment options compatible with your greenhouse frame
- Clearance for doors, vents, and other equipment
- A plan for adjusting or removing coverage when needed
E.share 40%-50% Black Shade Cloth for Garden, 20x100FT Sun Block Mesh Tarp

This durable 20×100 ft black shade cloth blocks 40%-50% of sunlight, providing ideal light conditions for healthy plant growth. Made from breathable HDPE material, it is easy to install, cut, and suitable for various outdoor applications including gardens, patios, and chicken coops.
Pros:
- Blocks 40%-50% of sunlight, ideal for plant growth
- Breathable mesh allows water and air flow
- Easy to cut and install for various outdoor uses
- Suitable for all-season garden protection
Cons:
- Limited to outdoor use only
- Shade level may not be sufficient for full sun protection in very hot climates
Best for: Growers who have measured areas needing sun reduction
Not ideal for: Structures where the listed dimensions do not fit the planned coverage
Bottom line: Measure coverage and preserve vent clearance before selecting this shade cloth.
Greenhouse Heaters
A heater is a climate-control option for periods when the greenhouse needs added warmth. The listed pick is the Greenhouse Heater with Digital Thermostat, 1500W. Consider how its 1500W specification fits your available electrical setup, and whether the digital thermostat suits the way you want to monitor and manage heating.
A common mistake is choosing a heater without considering the greenhouse’s size, construction, and access to power. Check the space where the unit would sit, how the cord will reach the outlet, and whether plants or other equipment would obstruct its placement. Read the product’s installation and use instructions for the required clearances and conditions; do not assume the greenhouse environment is automatically suitable for any heater.
Think about where you measure temperature and where the heater would be positioned. A reading near the unit may not represent conditions throughout the structure, so compare locations during routine checks. Confirm the available supply and follow the manufacturer’s placement guidance. Match the heater to the space by considering the greenhouse layout and the conditions you are trying to manage, then observe the results rather than relying on the thermostat setting alone.
What to look for:
- Electrical compatibility with the listed 1500W specification
- Placement that follows the product’s instructions and clearances
- A location that does not obstruct access or plant care
- Thermometer placement to compare conditions around the greenhouse
- Thermostat controls that suit your monitoring routine
Greenhouse Heater with Digital Thermostat, 1500W

This 1500W electric heater warms areas up to 160 sq. ft.
Pros:
- Adjustable digital thermostat with automatic cycling
- Overheat shutoff and IPX4 splash resistance
- Suitable for greenhouses and several other covered spaces
Cons:
- Coverage is limited to areas up to 160 sq. ft.
- No customer reviews or rating are provided
Best for: Growers who need a heater and digital thermostat in their setup
Not ideal for: Greenhouses without compatible power or suitable placement space
Bottom line: Verify electrical fit and follow the heater’s placement instructions.
Greenhouse Humidifiers
A humidifier adds moisture to the greenhouse environment, so first consider whether your observations point to a need for it. The listed pick is the 7000ml/h Industrial Commercial Humidifier, Cool Mist. Its name identifies cool mist and a stated output figure; fit the unit to the space and your water-management plan before choosing it.
A common mistake is assuming that one humidifier will suit every greenhouse or that adding mist automatically produces the desired conditions. Consider the greenhouse’s size and layout, where mist would travel, and how you will monitor conditions after installation. Check the product’s power needs, water supply approach, and placement requirements. Avoid positioning it where mist interferes with other equipment or where surfaces cannot be managed as intended.
Plan how you will refill or connect water, access the unit for cleaning, and keep track of humidity in different parts of the greenhouse. Confirm what the listed output means for your intended use by checking the product information, and ensure the surrounding setup can accommodate the mist. Begin with observation and adjust based on readings. Monitor before and after so you can tell whether the added moisture suits the plants and the greenhouse conditions.
What to look for:
- Power and water arrangements that suit your greenhouse
- Placement that allows mist to reach the intended area
- Access for refilling and cleaning
- A way to monitor humidity in separate greenhouse areas
- Product details that clarify the stated 7000ml/h output
7000ml/h Industrial Commercial Humidifier, Cool Mist
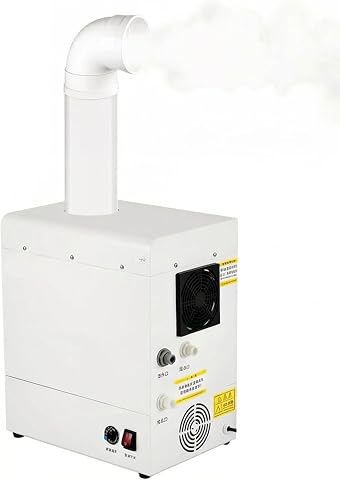
This industrial-grade humidifier delivers a high mist output of 7000ml/h, suitable for large spaces like factories and greenhouses. It features automatic water refill, adjustable mist volume, durable stainless steel construction, and compatibility with standard PVC piping for versatile setup.
Pros:
- High mist output suitable for large areas
- Automatic water refill system for continuous operation
- Durable stainless steel construction resists moisture damage
- Adjustable mist volume for precise humidity control
Cons:
- Requires connection to external water source and piping (not included)
- Large size may not be suitable for small spaces
- Manual refilling needed if auto-fill is not used
Best for: Growers whose observations indicate a need for added moisture
Not ideal for: Greenhouses without a plan to monitor humidity and manage water
Bottom line: Check placement, upkeep, and humidity readings before adding this humidifier.
Build your checklist in a practical order: start with measuring conditions, then address the clearest need in your greenhouse. Check vent fit before automating openings, plan fan placement and water routing, and measure shade coverage. Consider heating or added moisture only after observing conditions and confirming that the equipment fits your structure, power, and maintenance routine.
You do not need every climate-control item at once. Make one change, keep checking the same areas, and let what you observe guide the next step. With a clear picture of your greenhouse and careful attention to fit, you can create a more considered setup one decision at a time.
Fall yard work Picks
leaf blowers
As an affiliate, we earn on qualifying purchases.