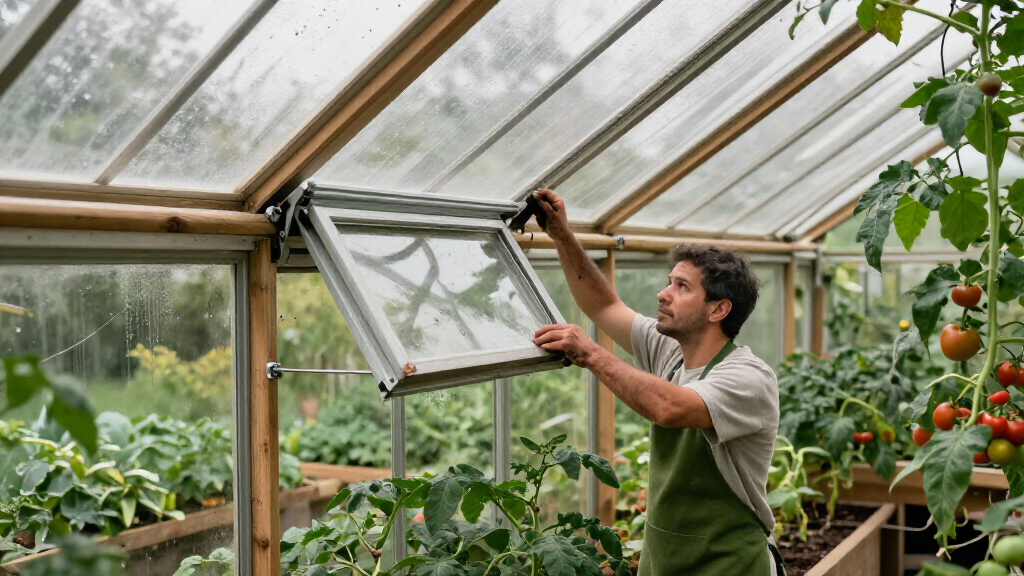

Install and test a wax-cylinder automatic opener to let a greenhouse vent respond to temperature without electricity. This guide is for greenhouse owners with basic hand-tool skills; allow 1–2 hours for one vent, including fitting and adjustment. The finished opener should move the vent freely, open it as the greenhouse warms, and close it as the air cools.

Get garden gear delivered free with Prime
- Fast, free delivery on millions of items
- Prime Video, Amazon Music and more included
- Member-only deals all year

2 Pack Solar Automatic Window Opener, Thermal Sensitive Vent Opener Kit
- ✔ Pack size: 2 openers
- ✔ Manufacturer: PATIOHZ
- ✔ Model number: PA001b_D*2

Greenhouse Window Opener (2 pcs) Auto Vent
- ✔ Pack size: 2 openers
- ✔ Manufacturer: XISOCO
- ✔ Model number: KCQ-01

Greenhouse Automatic Vent Opener – Solar Heat Sensitive Ventilation Kit
- ✔ Manufacturer: Timtop
- ✔ Model number: T023WP
- ✔ Dimensions: 3 x 1 x 1 inches
Difficulty: Beginner | Time: 1–2 hours
What You’ll Need
Tools & Materials:
- Automatic opener compatible with your vent type and greenhouse frame
- Tape measure or ruler
- Pencil or marker
- Screwdriver or drill with suitable bits
- Wrench or spanner if required by the opener
- Stable step ladder for a roof vent
Knowledge:
- Basic use of hand tools
- Ability to identify the vent frame and a secure mounting point
Read the opener instructions before starting. Check its maximum vent weight and opening travel against the vent, and confirm the kit includes the correct brackets and fasteners. Allow extra time if you need to replace damaged frame parts. Wear eye protection when drilling, and have someone steady a ladder or support a roof vent while you work.
2 Pack Solar Automatic Window Opener, Thermal Sensitive Vent Opener Kit
PATIOHZ earns the lead for buyers who want to automate two greenhouse vents and value a stated capacity of up to 30 lb. Its dual-spring design is intended to provide stronger thrust and better resistance to wind twist than a lighter single-duty setup, while the powder-coated aluminum alloy offers a weather-conscious alternative to the galvanized-steel XISOCO. Both two-packs list a 30 lb capacity, so the distinction here is more about material preference than a clear advantage in lifting strength.The listed 15–25°C operating range gives us a useful planning point, but also a real constraint: buyers should consider whether that response range suits the greenhouse conditions and their plants. Unlike XISOCO, PATIOHZ does not provide a maximum opening distance in the supplied specs, which makes it harder to confirm fit for a particular vent. Its included clamps are intended to simplify installation, yet unusually sized or non-standard windows may still be incompatible. Choose it for its combination of dual springs, two units, and coated aluminum; compare XISOCO first if a stated opening distance matters more.
Pros:
- Two openers can serve multiple greenhouse vents.
- Dual-spring design is rated for loads up to 30 lb.
- Powder-coated aluminum alloy is described as corrosion resistant.
- Solar heat-sensitive operation needs no electrical wiring.
Cons:
- The 15–25°C listed operating range may not suit every greenhouse climate or ventilation plan.
- The supplied specifications do not state maximum opening distance.
- Compatibility with unusually sized windows is not assured.
Best for: Greenhouse owners automating two standard-sized vents who want dual springs, a stated 30 lb capacity, and powder-coated aluminum construction.
Not ideal for: Buyers with unusually sized or non-standard windows, or anyone who needs a specified maximum opening distance before purchase.
Bottom line: We rank PATIOHZ first for its two-unit, dual-spring setup and coated aluminum construction, provided its unstated opening distance suits your vent.
“We rank PATIOHZ first for its two-unit, dual-spring setup and coated aluminum construction, provided its unstated opening distance suits your vent.”
Greenhouse Window Opener (2 pcs) Auto Vent
XISOCO is the clearest choice when maximum opening distance is central to fitting an opener: its listing specifies up to 45 cm, or about 17.72 inches. Like the leading PATIOHZ pick, it comes as a two-pack, uses dual springs, and lists capacity up to 30 lb. That makes it a plausible option for two vents where buyers want a stated opening measurement to compare against their window geometry.Its galvanized steel construction is described as corrosion resistant and durable, whereas PATIOHZ uses powder-coated aluminum alloy. The listings do not establish which material will last longer in a given greenhouse, so frame exposure and maintenance preferences should guide that choice. XISOCO also includes clamps and screws and allows manual adjustment of the opening, but the stated 45 cm maximum may be insufficient for larger vents. Its 15–25°C operating range is broadly similar to PATIOHZ’s stated range; neither listing promises suitability beyond those conditions. We place XISOCO just behind PATIOHZ because it offers a useful opening specification, but a more constrained maximum may rule it out for larger windows.
Pros:
- Two openers are included for multiple vents.
- Dual-spring design is rated for loads up to 30 lb.
- Maximum opening is specified as about 45 cm.
- Galvanized steel construction is described as corrosion resistant.
Cons:
- The 45 cm maximum may not suit larger vents.
- The stated operating range is 15–25°C, which may not match every setup.
- The listing says not to use above 60°C (140°F).
Best for: Buyers fitting two vents who want a stated maximum opening of 45 cm and a 30 lb load rating.
Not ideal for: Owners of larger vents needing more than 45 cm of opening, or buyers whose operating conditions fall outside the stated range.
Bottom line: We recommend XISOCO when its specified 45 cm opening helps confirm fit and galvanized steel suits your greenhouse conditions.
“We recommend XISOCO when its specified 45 cm opening helps confirm fit and galvanized steel suits your greenhouse conditions.”
Greenhouse Automatic Vent Opener – Solar Heat Sensitive Ventilation Kit
Timtop is the light-duty option in this lineup. Its stated 15 lb maximum load is half the capacity listed for PATIOHZ and XISOCO, so we would look to it for a smaller vent that does not need the stronger dual-spring capacity of those two-pack options. In return, its product details spell out the opening and closing thresholds: it begins opening at 25°C, is fully open at 30°C, and closes at 15°C. That gives buyers a more specific picture of its temperature response than the ranges supplied for the other two picks.The listed 18-inch lift is close to XISOCO’s 45 cm maximum opening, though the specifications use different wording, so buyers should confirm how the dimension applies to their vent. Timtop uses aluminum alloy and can be installed on plastic, wood, or metal frames, which may suit varied DIY greenhouse structures. The listing also says operation depends on sufficient sunlight, an important consideration in cloudy conditions. Unlike PATIOHZ and XISOCO, this product is presented as a single opener rather than a two-pack. Choose it when the lower capacity fits your vent and its stated thresholds match your needs; skip it for heavy windows or where a two-vent kit is the priority.
Pros:
- Solar-powered operation avoids wiring and batteries.
- Lists a maximum load of 15 lb and an 18-inch lift.
- Specifies opening and closing temperature thresholds.
- Can be installed on plastic, wood, or metal frames.
Cons:
- Its 15 lb capacity is below the 30 lb ratings of both two-pack alternatives.
- The listing says performance depends on sufficient sunlight.
- Designed for relatively small vents and described as a single opener.
Best for: Growers automating a smaller, lighter greenhouse vent who want stated temperature thresholds and frame material flexibility.
Not ideal for: Owners of heavy or large vents, buyers needing two openers in one package, or greenhouses with limited sunlight.
Bottom line: We would choose Timtop for a small, light vent where its specified temperature thresholds matter more than the higher capacity of the two-packs.
“We would choose Timtop for a small, light vent where its specified temperature thresholds matter more than the higher capacity of the two-packs.”
As an Amazon Associate we earn from qualifying purchases.
Before You Start
Choose an opener made for your vent style, such as a roof window or louver. Some models attach to the greenhouse frame; others require a specific bracket or hinge arrangement. Do not assume the supplied screws suit every frame. Use fasteners suitable for the greenhouse material, and avoid drilling near glass, glazing channels, or concealed wiring.
Check the forecast and work when the vent and greenhouse are cool. Wax-cylinder openers respond to heat, so a hot greenhouse can make the mechanism extend during installation. Keep the vent supported while fitting the opener; the mechanism is not a safety brace or a storm restraint.
Step-by-Step Instructions
Step 1: Check the vent and opener
Open and close the vent by hand. Look for loose hinges, bent parts, cracked glazing, or rubbing against the frame. Confirm that the opener model supports the vent’s type and weight, and compare its listed opening travel with the space available. Repair a sticking vent before installing the mechanism.
Tip:Do not use an opener to force a warped or jammed vent. Fix the cause of the resistance first.
Check: The vent moves smoothly by hand through its full travel, and the opener is rated for the vent.
Step 2: Choose the mounting positions
Use the manufacturer’s diagram to identify the frame bracket and the vent bracket. Hold each bracket in place with the vent closed, then check that the actuator can extend and retract along the intended path without twisting or hitting the frame. Mark the fixing holes with a pencil.
Tip:Leave enough clearance for the vent to reach the opener’s full travel. A bracket position that looks convenient can limit opening or make the actuator bind.
Check: The brackets align with the instructions, and the actuator has a clear path as the vent moves.
Step 3: Fit the frame bracket
Support the vent in the closed position. Drill pilot holes only where the frame material and kit instructions allow, taking care to avoid glass and glazing channels. Fasten the frame bracket securely with the specified screws or bolts. Keep the bracket square and do not overtighten fasteners into thin or brittle framing.
Tip:If the supplied fixing method does not suit your frame, use a compatible bracket or fastener recommended for that greenhouse material.
Check: The frame bracket sits flat and does not shift when you press it gently by hand.
Step 4: Attach the opener and vent bracket
Fit the opener body to the frame bracket in the orientation shown in the kit instructions. Connect the actuator rod or moving end to the vent bracket, then position the vent bracket against the vent frame. Keep the vent supported while marking and fastening the bracket. Tighten the joints enough to hold them while allowing the hinge points to pivot.
Tip:Do not shorten, heat, or lubricate a sealed wax cylinder unless the manufacturer explicitly directs it.
Check: The opener is attached at both ends, with pivot points aligned and no obvious side load on the rod.
Step 5: Move the vent through its travel
With the greenhouse cool, move the vent slowly from closed to open by hand if the instructions allow manual movement. Watch the actuator, brackets, and hinges throughout the motion. Stop if a part catches, twists, or reaches its limit before the vent does. Reposition the bracket or correct the interference before continuing.
Tip:Never force the vent against a fully extended or retracted actuator; that can damage the mechanism.
Check: The vent opens and closes without binding, and the opener remains aligned throughout the movement.
Step 6: Set the opening temperature
Adjust the opener’s temperature setting only as described by its manufacturer. Many wax-cylinder models use a threaded adjustment or removable clip to change when the vent begins opening. Make a small adjustment, then allow time for the greenhouse to warm or cool before judging the result. Set the opening point to suit your plants and local conditions.
Tip:Do not expect an instant response. The cylinder and greenhouse air need time to change temperature.
Check: The actuator begins moving at a temperature appropriate for the greenhouse, according to the model’s operating range.
Step 7: Test automatic operation
Let the greenhouse warm naturally, or follow the manufacturer’s safe test method. Observe the vent as the actuator extends. Later, check that the vent closes as the greenhouse cools and the actuator retracts. Keep people and objects clear of the moving vent, and do not use an open flame or direct high heat to trigger the mechanism.
Tip:Record the temperature and vent position during the first warm and cool cycles. This helps you make measured adjustments instead of repeatedly changing the setting.
Check: The vent opens as the greenhouse warms and closes as it cools, with smooth movement and no manual assistance.
Step 8: Secure the area and check fasteners
Close the vent, inspect every fixing, and remove tools and packaging from the greenhouse. Check that the opener does not obstruct shade cloth, shelving, or nearby vents. If high winds are expected, use the greenhouse maker’s recommended vent restraint or close and secure the vent as directed; the opener may not hold it against wind.
Tip:Recheck the fasteners after the first few operating cycles, especially on lightweight frames.
Check: The assembly is secure, the vent has clear operating space, and any separate wind restraint is available.
Common Mistakes to Avoid
- Buying an opener that cannot support the vent or does not match its style. — Check the manufacturer’s vent type, weight limit, bracket requirements, and opening travel before purchase.
- Positioning the brackets so the actuator twists or runs out of travel early. — Mock up the bracket locations with the vent closed, then check the complete movement path before drilling.
- Overtightening screws into a thin frame or drilling into glazing. — Use suitable pilot holes and frame-compatible fasteners; keep fixings clear of glass and glazing channels.
- Expecting the opener to respond immediately or resist strong wind. — Allow time for temperature changes and use a separate restraint or the manufacturer’s wind procedure.
Troubleshooting
Problem: The vent does not open as the greenhouse warms.
Solution:
Check that the opener is within its rated temperature range and that the cylinder is exposed to greenhouse air rather than shade or a cold frame section. Confirm that the vent opens freely by hand, then inspect for an actuator blocked by a bracket or fastener. Allow time for the cylinder to warm before adjusting the setting.
Problem: The vent opens only partway or the opener binds.
Solution:
Let the mechanism cool, support the vent, and inspect the rod alignment and bracket clearance. Reposition a bracket if the actuator is at an angle or contacts the frame. Confirm the opener travel is suitable for the vent; do not force the actuator beyond its limit.
Problem: The vent stays open after the greenhouse cools.
Solution:
Check for a stuck hinge, a latch or cable catching the vent, or an opener rod that cannot retract freely. Verify the model’s closing behavior and temperature range in its instructions. If the vent and linkage move freely but the cylinder does not retract after cooling, contact the manufacturer about the opener.
Problem: The bracket or screws loosen after operation.
Solution:
Stop using the vent until the mounting is secure. Inspect the frame for cracking or stripped holes, then refit with a compatible fixing method or suitable reinforcement. Do not compensate by overtightening screws in a damaged frame.
What Success Looks Like
The opener is firmly mounted, aligned with the vent, and clear of obstructions. Across a warm and cool cycle, the vent opens as the temperature rises and closes as it falls. Movement is smooth, fasteners stay secure, and the vent does not depend on the actuator to resist wind or hold it safely during maintenance.
Next Steps
Check the mechanism and fasteners every few weeks during the growing season and after storms. Keep hinges clear of debris and follow the manufacturer’s maintenance guidance for the cylinder. Recheck the opening temperature when seasons change or plant needs shift. Close and secure vents according to the greenhouse maker’s advice before high winds, and replace a damaged opener with a model compatible with the vent.
Frequently Asked Questions
Does an automatic greenhouse vent opener need electricity?
Most wax-cylinder models work without electricity. Heat makes the cylinder extend and open the vent; cooling lets it retract. Check the product instructions because other opener designs may use a power source.
How many openers does one greenhouse need?
Use the number and placement recommended for your vent size and greenhouse layout. A large or heavy vent may need more than one opener, but adding a second unit without checking compatibility can cause uneven movement or binding.
Can I install an opener on a side vent?
Yes, if the opener is designed for that vent style and can be mounted in the required orientation. Follow its diagram and check that the actuator moves freely through the full range.
Can I leave the opener installed in winter?
Follow the manufacturer’s temperature and seasonal storage instructions. Some models can remain fitted, while others should be removed or protected in cold conditions. Do not assume the opener will prevent freezing or hold the vent closed in a storm.
How do I know whether the opener has failed?
First confirm that the vent and hinges move freely and that the actuator is not obstructed. If the opener still fails to extend or retract after the greenhouse temperature changes through the model’s stated range, consult the manufacturer or replace the unit.